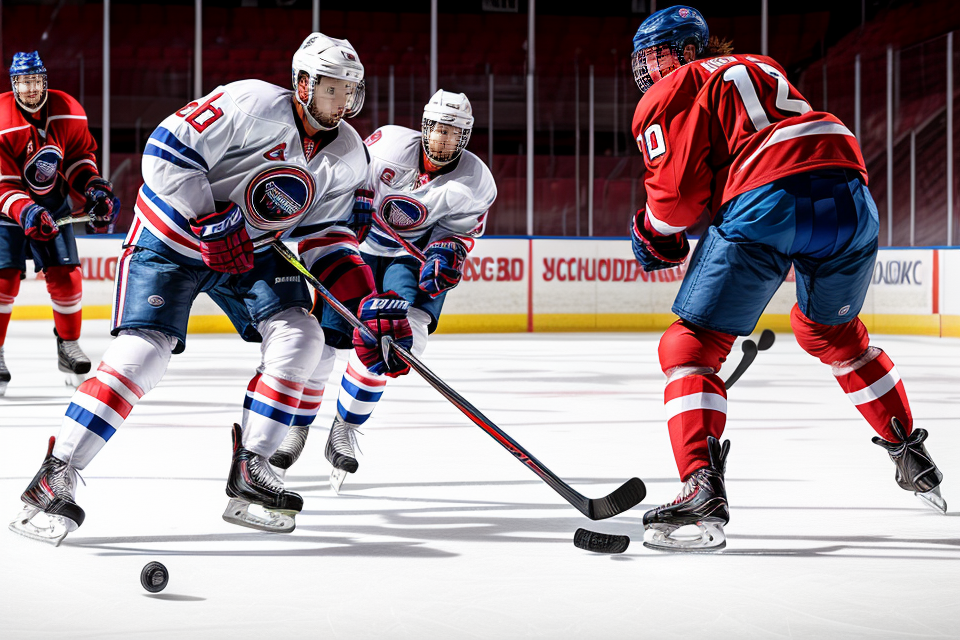
Hockey is a physically demanding sport that requires players to be well-protected to avoid injuries. Shin guards are essential gear for hockey players as they provide support and protection to the lower legs. However, taping hockey shin guards correctly is crucial to ensure they fit well and provide maximum protection. In this guide, we will explore the different techniques, tips, and tricks for taping hockey shin guards like a pro. Whether you’re a beginner or an experienced player, this guide will help you perfect your taping skills and keep you in the game.
Preparing for Taping
Choosing the Right Tape
When it comes to taping hockey shin guards, choosing the right tape is crucial. The right tape can make a significant difference in the performance and protection of your shin guards. Here are some factors to consider when choosing the right tape for your shin guards:
Waterproof vs. Non-Waterproof Tape
One of the most important factors to consider when choosing tape for your shin guards is whether it is waterproof or non-waterproof. Waterproof tape is designed to repel water, which can help keep your shin guards dry and lightweight. Non-waterproof tape, on the other hand, may absorb water, which can make your shin guards heavier and less comfortable. If you play hockey in a humid or wet environment, waterproof tape may be the better choice.
Cloth-Based vs. Paper-Based Tape
Another factor to consider when choosing tape for your shin guards is whether to use cloth-based or paper-based tape. Cloth-based tape is made from a woven fabric and is generally more durable than paper-based tape. It also provides better support and cushioning for your shin guards. Paper-based tape, on the other hand, is thinner and more flexible, making it easier to apply and remove. It is also less expensive than cloth-based tape.
When choosing the right tape for your shin guards, it is important to consider your personal preferences and the conditions in which you play. Take the time to experiment with different types of tape to find the one that works best for you.
Measuring and Cutting the Tape
Length and Width Guidelines
Before measuring and cutting the tape, it is important to understand the length and width guidelines. Generally, the tape should be long enough to wrap around the shin guard twice and be wide enough to cover the entire surface of the shin guard. It is recommended to measure the circumference of the shin guard and add an extra inch to ensure the tape is long enough.
Tips for Cutting the Tape
To cut the tape, start by using scissors to make a small incision at the edge of the tape. Then, carefully cut along the length of the tape, making sure to keep the blade perpendicular to the surface. It is important to avoid cutting the tape too short, as this can lead to uneven coverage and reduced protection. Additionally, it is recommended to round the edges of the tape to prevent irritation and discomfort.
Applying Pre-Tape
What is Pre-Tape?
Pre-tape is a thin, adhesive tape that is used to help protect the skin and shin guards from any potential irritation or chafing. It is designed to be applied directly to the skin before taping the shin guards in place.
How to Apply Pre-Tape
- Start by cleaning the area where the pre-tape will be applied with a damp cloth to remove any dirt or debris.
- Peel off the backing of the pre-tape and apply it to the area where the shin guards will be taped. Make sure to cover the entire area, including the front and back of the leg.
- Smooth out any bubbles or wrinkles in the pre-tape with your fingers to ensure a smooth application.
- Allow the pre-tape to sit on the skin for a few minutes to allow it to fully adhere.
- Once the pre-tape is fully adhered, it’s time to apply the hockey shin guards. Start by placing the guards over the pre-tape and smoothing them out so they are level with the skin.
- Apply the main tape to the shin guards, following the appropriate taping technique for your level of play.
- Once the main tape is applied, use scissors to trim any excess tape and make sure the tape is even and smooth.
- Finally, use a razor blade to shave down the front of the shin guards to create a more comfortable fit.
By following these steps, you can ensure that your shin guards are properly taped and ready for action on the ice.
Taping Techniques
Basic Taping Method
Step-by-Step Guide
- Start by removing any excess padding or foam from the shin guards to ensure a snug fit.
- Place the shin guards on the leg and trace the outline of the guard onto the skin with a marker or pen.
- Cut along the outline using scissors or a craft knife, making sure to cut the skin as well as the padding.
- Apply a layer of tape to the back of the shin guard, starting at the toe and working your way up to the knee. Make sure to press the tape down firmly onto the skin.
- Repeat the process for the other shin guard.
Tips and Tricks
- Use a stretchy athletic tape like SpiderTech or KT Tape for a more comfortable and supportive fit.
- Apply a thin layer of athletic cream or lotion to the skin before applying the tape for added comfort.
- Tape the shin guards in the exact position they will be worn during the game to ensure the right support and protection.
- Avoid overlapping the tape or applying it too tightly, as this can cause discomfort and reduce blood flow to the legs.
Wrapping Technique
- Begin by cleaning and drying the shin guards, making sure they are free from any dirt or debris.
- Next, lay out the tape you will be using and cut it to the appropriate length.
- Start at the bottom of the shin guard and wrap the tape around the entire circumference of the guard, overlapping each layer as you go.
- Continue wrapping until you reach the top of the shin guard, making sure to keep the tape tight and even.
-
Once you have reached the top, cut the tape to the desired length and use scissors to make a clean edge.
-
When wrapping the tape, it is important to make sure that the layers are overlapped evenly and that the tape is tight to provide maximum support.
- If you notice any areas where the tape is loose or uneven, use scissors to trim the tape and make sure it is secure.
- Some players prefer to use a different color tape for each leg, making it easier to tell which leg is which during a game.
- Experiment with different tape brands and thicknesses to find the one that works best for you.
Customized Taping
Customized taping involves modifying the basic taping method and creating personalized taping patterns to fit an individual’s specific needs and preferences. This technique requires a thorough understanding of the anatomy of the leg and the mechanics of hockey movements.
Modifying the Basic Taping Method
Modifying the basic taping method involves making adjustments to the placement and direction of the tape on the shin guard. This can include adding additional layers of tape in certain areas or changing the angle of the tape to provide extra support in specific movements.
One common modification is to add a second layer of tape along the outside of the shin guard, known as the “Y” taping method. This method involves applying two vertical strips of tape on the outside of the shin guard, one on the front and one on the back, and then connecting them with a horizontal strip of tape in the middle. This technique provides extra support and stability to the ankle and helps prevent injuries.
Another modification is to use pre-cut tape strips that are specifically designed for hockey taping. These strips are usually wider and longer than regular athletic tape, which allows for a more secure and comfortable fit. They also come in a variety of colors, which can help players differentiate between different taping methods or identify their own equipment.
Creating Personalized Taping Patterns
Creating personalized taping patterns involves designing unique taping techniques that are tailored to an individual’s specific needs and preferences. This can include experimenting with different tape placements, angles, and directions to find the most effective and comfortable fit.
One popular personalized taping pattern is the “X” taping method. This method involves applying two horizontal strips of tape on the front and back of the shin guard, and then connecting them with a vertical strip of tape in the middle. This technique provides extra support and stability to the ankle and helps prevent injuries.
Another personalized taping pattern is the “figure 8” method. This method involves applying two vertical strips of tape on the front and back of the shin guard, and then weaving them together in a figure 8 pattern around the ankle. This technique provides a secure and comfortable fit, while also allowing for a full range of motion.
In conclusion, customized taping involves modifying the basic taping method and creating personalized taping patterns to fit an individual’s specific needs and preferences. This technique requires a thorough understanding of the anatomy of the leg and the mechanics of hockey movements, and may involve experimenting with different tape placements, angles, and directions to find the most effective and comfortable fit.
Shin Guard Maintenance
Removing Tape
After a game or practice, it’s important to properly remove the tape from your hockey shin guards to ensure they are ready for the next use. Here’s a step-by-step guide to help you remove the tape effectively:
- Start by unwinding the tape from the bottom of the shin guard.
- Gently pull the tape off the guard, starting from the heel and working your way up to the top.
- Be careful not to damage the foam or other materials on the shin guard while removing the tape.
-
Once the tape is completely removed, inspect the guard for any damage or wear and tear.
-
Use a flat surface and a friend to help you remove the tape for a more secure grip.
- Avoid using scissors to cut the tape, as this can damage the guard.
- If you notice any damage to the guard, repair it before taping it up again.
- Consider using a different type of tape or a new roll of tape for your next application to ensure the best performance.
Replacing Tape
When to Replace Tape
Ideally, hockey players should replace their shin guard tape after every game or practice. However, the frequency of tape replacement may vary depending on factors such as the player’s style of play, the level of competition, and the quality of the tape used. It is important to assess the condition of the tape regularly and replace it when necessary to ensure maximum protection and performance.
- Remove the old tape: Carefully peel off the old tape from the shin guard, starting from the corners and working your way towards the center. Make sure to remove any dirt or debris that may be stuck to the tape.
- Clean the shin guard: Use a soft cloth or sponge to wipe away any remaining dirt or debris from the shin guard. This will help the new tape adhere better to the surface.
- Apply a barrier spray: Apply a barrier spray or adhesive enhancer to the shin guard to create a surface that is easier for the new tape to adhere to. Make sure to follow the instructions on the product label for best results.
- Cut the new tape: Cut a piece of new tape that is slightly larger than the area you will be taping. This will allow you to trim any excess tape later on.
- Apply the new tape: Start at one corner of the shin guard and apply the new tape, working your way towards the center. Make sure to smooth out any bubbles or wrinkles as you go along.
- Trim the excess tape: Use scissors to trim any excess tape that extends beyond the edges of the shin guard.
- Secure the tape: Use a tape dispenser or your fingers to smooth out the tape and make sure it is securely in place. Make sure that the tape is tightly applied to the shin guard and that there are no gaps or loose areas.
- Check for proper fit: Make sure that the tape is not too loose or too tight. A good rule of thumb is to apply just enough tape to cover the area where the shin guard will be worn, without leaving any gaps.
- Repeat the process: Repeat the process for the other shin guard.
By following these steps, you can ensure that your shin guards are properly taped and ready for gameplay. Remember to inspect the tape regularly and replace it as needed to maintain the highest level of protection and performance.
Storing Shin Guards
When it comes to maintaining your hockey shin guards, proper storage is crucial to ensure they last longer and remain in good condition. Here are some tips for storing your shin guards:
- Always remove your shin guards after each use and store them in a cool, dry place.
- Avoid storing your shin guards in direct sunlight or in areas with high humidity, as this can cause damage to the materials.
- If you have multiple pairs of shin guards, make sure to label them so you can keep track of which ones you’ve used and which ones are clean.
- Consider investing in a shin guard bag or case to protect your equipment and keep it organized.
- If you notice any tears or damage to your shin guards, it’s important to repair them promptly to avoid further damage.
By following these simple tips, you can help extend the life of your hockey shin guards and keep them in top condition for your next game.
Troubleshooting and Common Issues
Dealing with Loose Tape
Causes of Loose Tape
Loose tape can be a frustrating issue for hockey players, but there are several causes that can contribute to this problem. One common cause is not applying enough tension when wrapping the tape around the shin guard. This can result in the tape being too loose and causing it to move around during play. Another cause can be using the wrong type of tape, as some tapes are designed to be more flexible and may not provide enough grip on the shin guard. Additionally, not properly aligning the tape on the shin guard can also cause loose tape.
Solutions for Loose Tape
If you’re experiencing loose tape on your hockey shin guards, there are several solutions you can try. One solution is to apply more tension when wrapping the tape around the shin guard. Make sure to wrap the tape snugly and evenly around the guard, leaving no gaps or loose ends. If you’re still having trouble with loose tape, try using a different type of tape that is designed to be more grippy. Some players also find success by adding an additional layer of tape on top of the existing tape to provide extra grip. Finally, make sure to properly align the tape on the shin guard before taping it up to prevent any loose tape issues.
Managing Tape Pulls and Rips
One of the most common issues that hockey players encounter when taping their shin guards is managing tape pulls and rips. These can be frustrating and may compromise the protection that the tape is supposed to provide. Here are some causes and solutions for managing tape pulls and rips:
Causes of Tape Pulls and Rips
Tape pulls and rips can occur for a variety of reasons. One common cause is not allowing enough time for the tape to fully set before putting on the shin guard. If the tape is not fully set, it can be more prone to pulls and rips. Another cause can be applying too much pressure or tension on the tape when wrapping the shin guard. This can cause the tape to stretch and weaken, making it more susceptible to pulls and rips. Additionally, not properly aligning the tape with the natural contours of the shin can also cause pulls and rips.
Solutions for Tape Pulls and Rips
To manage tape pulls and rips, here are some solutions:
- Allow enough time for the tape to fully set before putting on the shin guard. This can take anywhere from 30 seconds to a few minutes, depending on the type of tape used.
- Apply the right amount of pressure and tension when wrapping the shin guard. Avoid over-tightening the tape, as this can cause it to stretch and weaken.
*Align the tape with the natural contours of the shin to avoid any potential areas of stress or pressure that can cause pulls and rips. - If a pull or rip does occur, try to gently smooth out the tape and minimize any further damage. If the pull or rip is significant, consider reapplying the tape or using a different tape altogether.
By following these solutions, hockey players can better manage tape pulls and rips and ensure that their shin guards remain protected throughout the game.
Preventing Blisters and Bruises
Tips for Protecting the Shin
- Ensure proper fitting of shin guards to prevent excessive movement and rubbing.
- Apply a thin layer of a moisturizing cream or lotion to the shin guards before putting them on to help prevent blisters.
- Tape the shin guards in a way that provides maximum support and minimizes any gaps or openings where blisters can form.
- Consider using a blister prevention product, such as a spray or patch, to provide an extra layer of protection.
- Take breaks during games or practices to check for any signs of discomfort or blisters and address them immediately.
- Consider wearing an additional layer of padding, such as a compression sleeve, to provide extra protection against bruises.
Recap of Key Points
When it comes to taping hockey shin guards, there are several key points to keep in mind to ensure a successful and secure fit. Here is a recap of some of the most important considerations:
- Choose the right tape: Make sure to use a high-quality athletic tape that is designed for hockey shin guards. This will provide the best support and protection for your legs.
- Measure twice, tape once: Before applying the tape, make sure to measure the circumference of your shin guard and mark the appropriate placement. This will help ensure that the tape is applied evenly and correctly.
- Apply the tape in the right direction: The tape should be applied in a crisscross pattern, starting at the bottom of the shin guard and working up towards the top. Make sure to apply the tape in the correct direction to provide the most support and protection.
- Tighten the tape: Once the tape is applied, use your fingers or a tape applicator to tighten the tape and ensure a secure fit. Make sure that the tape is not too loose or too tight, as this can affect the fit and performance of your shin guards.
- Check for any gaps or wrinkles: Before hitting the ice, make sure to check for any gaps or wrinkles in the tape. This can indicate that the tape is not applied correctly or is not providing enough support. If any issues are found, reapply the tape as necessary.
By following these key points, you can ensure that your hockey shin guards are properly taped and ready for game time.
Future Considerations and Recommendations
In order to ensure optimal performance and protection, it is essential to periodically reassess and update taping techniques for hockey shin guards. As players grow and develop, their equipment needs may change, and new innovations in taping technology may become available.
One important consideration for the future is the potential impact of advances in materials science on shin guard taping. As new materials are developed that offer improved durability, flexibility, and protection, taping techniques may need to be adapted to take full advantage of these advances.
Another future consideration is the potential for personalized taping based on individual player needs. As researchers gain a better understanding of the biomechanics of hockey-related injuries, it may be possible to develop taping techniques that are tailored to the specific needs of individual players. This could lead to even greater levels of protection and performance.
In addition to these considerations, it is important to stay up-to-date with the latest trends and best practices in shin guard taping. This may involve attending workshops and seminars, consulting with sports medicine professionals, and participating in online forums and discussion groups.
Overall, by staying informed and proactive in their approach to shin guard taping, players and coaches can ensure that they are always able to perform at their best while minimizing the risk of injury.
FAQs
1. What is the purpose of taping hockey shin guards?
The purpose of taping hockey shin guards is to provide extra support and protection to the lower leg, particularly around the shins and ankles. This is important because hockey is a fast-paced and physically demanding sport that involves a lot of skating, stickhandling, and contact with other players. Shin guards help prevent injuries to the legs and feet, and taping them can provide additional stability and cushioning.
2. What kind of tape should I use to tape my hockey shin guards?
When it comes to taping hockey shin guards, there are a few different options to choose from. You can use pre-made athletic tape that is specifically designed for shin guards, or you can use regular athletic tape and cut it to size. Some players also prefer to use kinesiology tape, which is a flexible and stretchy tape that is applied in a specific pattern to provide support and stability. Ultimately, the choice of tape will depend on your personal preference and the specific needs of your legs.
3. How do I properly tape my hockey shin guards?
To properly tape your hockey shin guards, start by cleaning the shins and removing any loose hair or debris. Then, lay the tape out on a flat surface and cut it to the appropriate length. Next, apply the tape to the front and sides of the shin guard, making sure to leave the back open. Start at the top of the shin guard and work your way down, smoothing the tape as you go. Make sure the tape is tight but not too tight, and that it is applied evenly across the shin guard. Finally, secure the tape to the back of the shin guard with a few pieces of scotch tape.
4. How long should I wear my taped hockey shin guards?
You should wear your taped hockey shin guards for the duration of your hockey game or practice. The tape will help provide extra support and protection to your legs during physical activity, and it will help prevent injuries. It is important to remove the tape once you are finished playing, as leaving it on for too long can cause irritation and discomfort.
5. Can I reuse my taped hockey shin guards?
Yes, you can reuse your taped hockey shin guards for multiple games or practices. Simply remove the tape after each use and wash the shin guards with soap and water. Then, allow the shin guards to air dry completely before taping them up again. This will help keep the tape clean and free of bacteria, and it will prolong the life of your shin guards.