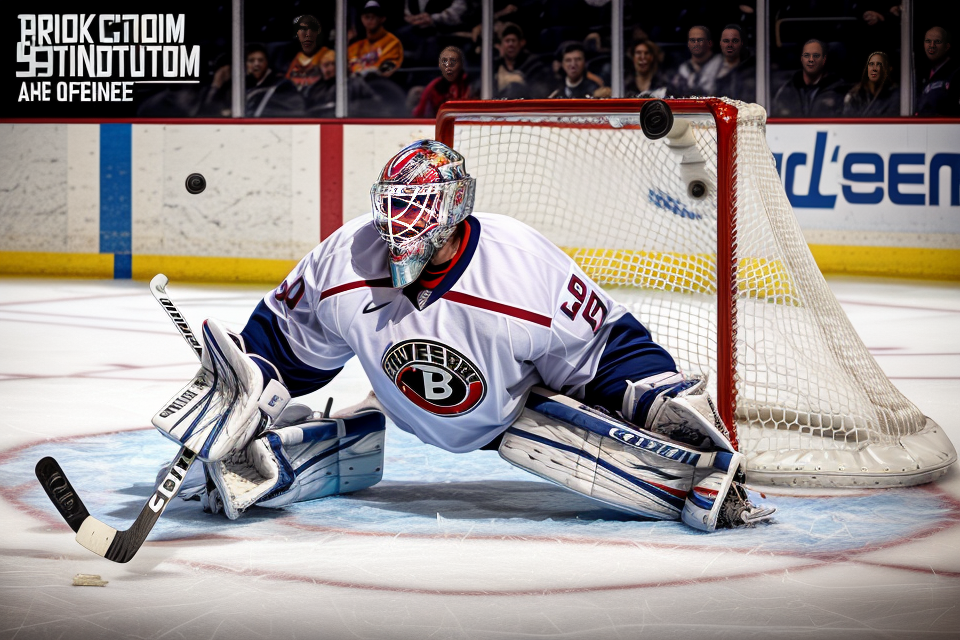
The question of where to tape a goalie stick has been a topic of discussion among hockey players and coaches for years. It is a crucial aspect of the game that can greatly impact a goalie’s performance on the ice. Many factors come into play when determining the perfect position for taping a goalie stick, including the goalie’s playing style, the type of stick being used, and the specific playing conditions. In this article, we will explore the various options for taping a goalie stick and provide insights into how to find the optimal position for maximum performance. So, whether you’re a seasoned pro or just starting out, read on to discover the secrets to success on the ice.
Understanding the Basics of Goalie Sticks
Material Composition
When it comes to the material composition of goalie sticks, there are two main options: wood and composite materials. Each of these options has its own set of advantages and disadvantages, and the right choice will depend on the individual player’s needs and preferences.
- Wooden Goalie Sticks:
- Wood is a traditional material that has been used for goalie sticks for many years.
- It is a natural material that can provide a good balance of flexibility and durability.
- Wooden sticks are often preferred by players who value the traditional feel of wood and appreciate the natural grain patterns.
- However, wooden sticks can be heavier than composite sticks, which may affect the player’s mobility and speed.
- Additionally, wooden sticks require more maintenance than composite sticks, as they can crack or break if not cared for properly.
- Composite Goalie Sticks:
- Composite sticks are made from a combination of materials, such as carbon fiber, fiberglass, and resin.
- They are typically lighter than wooden sticks, which can improve the player’s speed and mobility.
- Composite sticks are also more durable than wooden sticks, as they are less likely to crack or break.
- They can also provide a more consistent feel and performance, as the materials used in their construction can be precisely controlled.
- However, composite sticks can be more expensive than wooden sticks, and some players may prefer the traditional feel of wood.
When choosing the right material for your goalie stick, it is important to consider your personal preferences and playing style. If you value tradition and prefer the feel of wood, then a wooden stick may be the best choice for you. However, if you are looking for a lighter, more durable stick that can provide consistent performance, then a composite stick may be the better option.
Shaft and Blade Design
When it comes to goalie sticks, the shaft and blade design play a crucial role in determining the optimal position for taping the stick. The shaft curvature and blade shape have a significant impact on the stick’s performance, which in turn affects the positioning of the tape.
- Shaft Curvature: The shaft curvature is a crucial aspect of goalie stick design. It determines the flexibility and responsiveness of the stick, which are essential qualities for a goalie. A goalie stick’s shaft should be flexible enough to allow for quick movements and responsive enough to provide the necessary power behind the movements. The shaft curvature also affects the positioning of the tape, as it determines where the stick will bend and how much control the goalie will have over the stick.
- Blade Shape: The blade shape is another important aspect of goalie stick design. The blade shape determines the size and shape of the hitting surface, which directly affects the stick’s performance. A goalie stick’s blade should be large enough to provide a significant hitting surface, but not so large that it becomes unwieldy. The blade shape also affects the positioning of the tape, as it determines where the stick will bend and how much control the goalie will have over the stick.
In conclusion, the shaft and blade design of a goalie stick play a crucial role in determining the optimal position for taping the stick. The shaft curvature and blade shape affect the stick’s performance and the positioning of the tape. A goalie stick with the right shaft curvature and blade shape will provide the necessary flexibility, responsiveness, and control for optimal performance.
Preparing the Goalie Stick for Taping
Cleaning and Sanding
When it comes to achieving optimal performance from your goalie stick, proper preparation is key. This includes ensuring that the surface of the stick is clean and smooth, as this will provide the best possible adhesion for the tape. Here are some tips for cleaning and sanding your goalie stick:
Importance of a clean and smooth surface for optimal adhesion
A clean and smooth surface is essential for ensuring that the tape adheres properly to your goalie stick. Any dirt, dust, or debris on the surface of the stick can interfere with the adhesive properties of the tape, leading to poor performance and decreased accuracy. Therefore, it’s important to take the time to thoroughly clean and prepare the surface of the stick before applying the tape.
Sanding techniques for a smooth finish
Sanding is an effective way to achieve a smooth finish on the surface of your goalie stick. However, it’s important to use the right sanding techniques to avoid damaging the stick or leaving behind any scratches or blemishes. Here are some tips for sanding your goalie stick:
- Start with a coarse-grit sandpaper (such as 80-100 grit) to remove any dirt or debris from the surface of the stick.
- Move on to a finer-grit sandpaper (such as 220-320 grit) to smooth out the surface and remove any scratches or blemishes.
- Use circular motions when sanding to avoid leaving behind any uneven marks or grooves.
- Be sure to sand in the same direction as the grain of the wood to avoid causing any damage to the stick.
- When you’re finished sanding, wipe down the surface of the stick with a damp cloth to remove any dust or debris.
By following these tips for cleaning and sanding your goalie stick, you’ll be well on your way to achieving optimal performance on the ice.
Applying Tape
Choosing the right type of tape is crucial to ensure a secure hold and optimal performance. Some goalies prefer a more flexible tape, while others prefer a stiffer tape. Flexible tape is more forgiving and can conform to different shapes, while stiffer tape provides a more stable grip. It is essential to consider personal preference and playing style when choosing the right type of tape.
Once the type of tape has been chosen, the proper application technique should be followed to ensure a secure hold. The tape should be applied in a straight line, starting from the handle and working towards the blade. It is important to keep the tape tight and close to the stick, avoiding any loose ends that could interfere with gameplay. Additionally, it is recommended to apply multiple layers of tape for added security. The tape should be stretched tightly around the shaft, covering the entire surface to create a smooth and consistent grip. The tape should be applied evenly, with no bubbles or wrinkles, to ensure a comfortable and secure hold. With the proper application technique, the goalie stick is ready for optimal performance on the ice.
Choosing the Right Location for Taping
The Heel of the Stick
The heel of the goalie stick is an essential part of the stick that often goes unnoticed by many players. However, it plays a crucial role in a goalie’s performance on the ice. Taping the heel of the stick correctly can improve a goalie’s grip, control, and ability to make quick movements while blocking shots.
Proper alignment for optimal performance
The heel of the stick should be aligned with the skates of the goalie. This allows the goalie to maintain proper balance and control while in position to make a save. If the heel is not properly aligned, it can cause the goalie to lose their balance or have difficulty controlling the stick during gameplay.
In addition to alignment, the tape used to tape the heel of the stick should be applied evenly and securely. This will ensure that the goalie has a firm grip on the stick and can quickly move it in any direction when needed. The tape should also be able to withstand the wear and tear of regular gameplay, so it is important to choose a high-quality tape that can stand up to the demands of the sport.
Overall, the heel of the goalie stick is a critical component of the stick that should not be overlooked. Properly taping the heel can greatly improve a goalie’s performance on the ice and give them the edge they need to make crucial saves.
The Blade
Different taping techniques for different parts of the blade
The positioning of the tape on the blade can have a significant impact on the goalie’s performance. There are various taping techniques that can be used for different parts of the blade, depending on the goalie’s style and preferences.
- For example, taping the blade closer to the handle can provide more control and accuracy when making stops and saves.
- Alternatively, taping the blade closer to the tip can increase the goalie’s reach and allow for more powerful clears.
The role of taping in enhancing puck control and accuracy
Taping the blade can also help improve a goalie’s puck control and accuracy. By providing a smoother surface, the tape can help the goalie move the puck more easily and make quicker passes. Additionally, the tape can help the goalie maintain a better grip on the stick, allowing for more precise movements and shots.
It is important to note that the type of tape used can also affect the performance of the stick. For example, using a grip tape can provide more control and improve the goalie’s grip on the stick, while a tacky tape can increase the stick’s sensitivity and allow for more precise movements.
Ultimately, the perfect position for taping the goalie stick will depend on the individual goalie’s style and preferences. It is important to experiment with different techniques and positions to find what works best for each goalie.
The Shaft
The Importance of Taping the Shaft for a Secure Grip
Taping the shaft of a goalie stick is a crucial aspect of optimizing performance on the ice. By securing the stick to the goalie’s blade, the player can maintain a consistent grip and control, leading to better puck handling and improved accuracy when passing or shooting. Additionally, taping the shaft provides a sense of security and stability, allowing the goalie to focus on the play without worrying about the stick slipping out of their hands.
Different Taping Techniques for Various Positions on the Shaft
When it comes to taping the shaft, there are different techniques that can be used depending on the position of the tape. Here are some of the most common taping techniques used by goalies:
- Base Tape: This is the first layer of tape applied to the shaft, typically about 2-3 inches from the blade. The base tape provides a solid foundation for the rest of the taping process and helps to keep the stick in place.
- Lacing Tape: This is the second layer of tape applied to the shaft, usually about 4-5 inches from the blade. Lacing tape is applied in a crisscross pattern and is used to provide additional support and grip on the stick.
- Blade Tape: This is the third layer of tape applied to the shaft, right above the blade. Blade tape is applied in a vertical pattern and is used to secure the stick to the blade, providing a solid connection between the two.
- End Tape: This is the final layer of tape applied to the shaft, right before the end of the stick. End tape is applied in a horizontal pattern and is used to provide additional support and grip at the end of the stick, where the most significant impact occurs during the swing.
Overall, the right location for taping a goalie stick is crucial for optimal performance. By understanding the importance of taping the shaft and the different techniques used for various positions on the shaft, goalies can improve their grip, control, and accuracy on the ice.
The Tape Itself
Choosing the right thickness and color of tape is crucial in ensuring optimal performance for a goalie stick. The tape should be able to provide support and stability to the stick while allowing for the necessary flexibility to respond to different shots and moves.
Thickness of Tape
The thickness of the tape can greatly affect the stick’s performance. A thicker tape may provide more support and stability, but it may also make the stick heavier and less responsive. On the other hand, a thinner tape may allow for more flexibility and response, but it may not provide enough support. Therefore, it is important to choose a tape that strikes the right balance between support and responsiveness.
Color of Tape
The color of the tape can also play a role in a goalie’s performance. Some goalies prefer a white tape as it provides good visibility and allows them to see the puck better. Other goalies may prefer a colored tape, such as blue or red, as it can help them differentiate between the puck and the background. Ultimately, the choice of color should be based on personal preference and what works best for the individual goalie.
Properly Positioning the Tape
Properly positioning the tape on the stick is also essential for optimal performance. The tape should be placed in a way that provides support to the areas of the stick that need it most, such as the blade and the shaft. It is also important to ensure that the tape is not too tight or too loose, as this can affect the stick’s responsiveness and flexibility.
In conclusion, choosing the right thickness and color of tape, as well as properly positioning it on the stick, can greatly impact a goalie’s performance on the ice. It is important to experiment with different types and colors of tape to find the one that works best for the individual goalie.
Ensuring a Long-Lasting Grip
Proper Maintenance
Regular maintenance is crucial to ensuring a long-lasting grip on a goalie stick. Failure to maintain the stick properly can result in a loss of control and diminished performance. Here are some key aspects of proper maintenance:
Cleaning the Stick
Regular cleaning is essential to prevent the buildup of dirt, grime, and other debris that can affect the grip. Use a soft cloth or sponge to wipe down the stick after each use. If necessary, use a mild detergent and water solution to remove stubborn stains. Be sure to dry the stick thoroughly before taping it up.
Inspecting the Tape
Inspect the tape regularly for signs of wear and tear. If the tape is frayed, cracked, or peeling, it’s time to replace it. This is especially important if you’re using a tape specifically designed for goalie sticks, as these can be more expensive and difficult to find.
Repositioning the Tape
If the tape has shifted or come loose, reposition it to ensure a secure grip. Use a thin layer of water or a tape adhesive remover to loosen the tape, then press it back into place. Be sure to allow the adhesive to dry completely before using the stick again.
By following these proper maintenance steps, you can ensure that your goalie stick remains in top condition and provides the optimal performance you need on the ice.
Taping Techniques for Different Game Situations
When it comes to taping a goalie stick, different game situations require different taping techniques to ensure optimal performance.
Taping for Defense
For defense, the goalie stick should be taped to provide a firm grip and quick release. The tape should be applied to the bottom hand of the stick, covering the entire surface of the blade. This will allow the goalie to make quick and accurate saves, while still having a firm grip on the stick.
Taping for Offense
For offense, the goalie stick should be taped to provide a more flexible grip, allowing for quick changes in direction and more precise movements. The tape should be applied to the top hand of the stick, covering only the bottom half of the blade. This will allow the goalie to have a more flexible grip, while still maintaining control over the stick.
Taping for Goalies with Specific Playing Styles
For goalies with specific playing styles, the taping technique may need to be adjusted to suit their individual needs. For example, a goalie who likes to use a lot of glove saves may benefit from taping the stick with a little more tape on the top hand, to provide a more secure grip when making glove saves.
Overall, the key to finding the perfect position for taping a goalie stick is to experiment with different techniques to find what works best for each individual goalie and their specific playing style.
FAQs
1. What is the best way to tape a goalie stick for optimal performance?
The way you tape your goalie stick can have a significant impact on your performance on the ice. The ideal position for taping your stick is around 2-3 inches from the top of the shaft, which allows for maximum control and accuracy when handling the puck. This position also allows for a smooth and comfortable grip, reducing the risk of blisters or hand fatigue.
2. Should I tape my goalie stick differently for left and right-handed players?
No, the position of the tape on your goalie stick does not change based on whether you are left or right-handed. The optimal position for taping your stick is always around 2-3 inches from the top of the shaft, regardless of which hand you use to hold the stick.
3. Can I use different types of tape for my goalie stick?
Yes, there are many different types of tape that you can use to tape your goalie stick. Some goalies prefer to use clear tape, while others prefer colored tape for better visibility. You can also use specialized grip tape designed specifically for hockey sticks, which can provide added support and control. Ultimately, the choice of tape is a personal preference and can depend on factors such as the type of game, the surface of the ice, and your own playing style.
4. How tight should I tape my goalie stick?
The tension of the tape on your goalie stick should be snug but not too tight, as this can affect your ability to grip the stick and reduce your control on the ice. A good rule of thumb is to apply enough tension to keep the tape in place, but not so much that it feels uncomfortable or restrictive. You should also avoid taping the stick too loosely, as this can cause the tape to shift during play and affect your grip.
5. Can I reuse the tape on my goalie stick?
Yes, you can reuse the tape on your goalie stick if it is still in good condition. However, the tape may start to lose its grip and become less effective over time, so it’s important to regularly inspect the tape and replace it as needed. Additionally, if the tape becomes dirty or damaged, it may affect your grip on the stick and should be replaced.


