Are you a goalie looking to get the most out of your chest protector? Breaking in your goalie chest protector is an essential step in ensuring it provides the best protection and comfort on the ice. This comprehensive guide will walk you through the process of breaking in your goalie chest protector, from the initial steps to maintenance tips. With a combination of practical advice and expert insights, you’ll be ready to take on the competition with confidence. So, let’s get started and learn how to break in your goalie chest protector like a pro!
Why Breaking in Your Goalie Chest Protector is Important
Understanding the Importance of a Proper Break-in Period
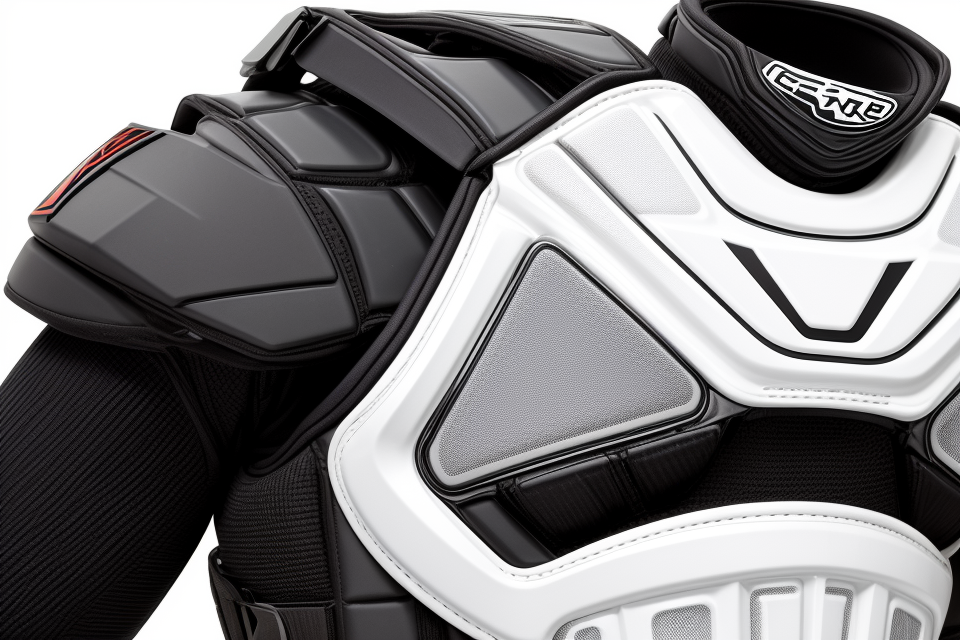
As a goalie, it is essential to have the right gear to protect yourself during games. Among the gear, the goalie chest protector is one of the most critical pieces of equipment. It is designed to protect the chest, heart, and lungs from impacts during the game. However, without a proper break-in period, the goalie chest protector may not fit or feel right, leading to discomfort and even injury. In this section, we will discuss the importance of a proper break-in period for your goalie chest protector.
Reducing Discomfort and Increasing Comfort
One of the primary reasons for breaking in your goalie chest protector is to reduce discomfort and increase comfort. A new chest protector can be stiff and uncomfortable, making it difficult to move and breathe properly. A proper break-in period allows the padding to conform to your body shape, reducing the stiffness and increasing comfort. As a result, you will be able to move and breathe more freely, allowing you to focus on the game rather than discomfort.
Improving Fit and Mobility
Another important reason for breaking in your goalie chest protector is to improve fit and mobility. A poorly fitting chest protector can restrict your movement, making it difficult to move your arms and torso freely. A proper break-in period allows the padding to mold to your body shape, improving the fit and mobility. This will enable you to move your arms and torso more freely, allowing you to make saves and move around the net more easily.
Preventing Injury
Finally, a proper break-in period can help prevent injury. A stiff and uncomfortable chest protector can cause strain and pressure on your chest, heart, and lungs, leading to injury over time. By breaking in your chest protector, you can reduce the risk of injury and play the game safely.
In conclusion, a proper break-in period is crucial for your goalie chest protector. It will reduce discomfort, improve fit and mobility, and prevent injury, allowing you to focus on the game and play safely.
Ensuring a Comfortable and Protective Fit
As a goalie, the chest protector is one of the most critical pieces of equipment you will wear. It is designed to protect your chest and vital organs from impacts and collisions during gameplay. However, a poorly fitting chest protector can be uncomfortable and hinder your performance on the ice. That’s why breaking in your goalie chest protector is crucial to ensure a comfortable and protective fit.
Breaking in your chest protector will allow the pads to conform to the shape of your body, providing a customized fit that feels comfortable and secure. Here are some tips on how to break in your goalie chest protector:
Wearing the Chest Protector
- Wear the chest protector for short periods of time at first, gradually increasing the duration of wear as your body adjusts to the fit.
- Start by wearing the chest protector during practice sessions or light drills, and gradually work up to full-contact games.
- As you wear the chest protector, move around and perform various movements to help the pads conform to your body shape.
Using Heat
Another method to break in your chest protector is by using heat. Here’s how:
- Place the chest protector in a well-ventilated area and apply a heat source such as a hair dryer or a heat gun to the pads for several minutes.
- Once the pads are warm, place them on your body and wear them for a short period of time.
- Repeat this process several times until the pads are fully broken in.
Breaking in Multiple Pads
If you have multiple pads in your chest protector, it’s important to break them in separately. Here’s how:
- Place each pad in a well-ventilated area and apply a heat source such as a hair dryer or a heat gun to the pads for several minutes.
- Repeat this process several times until each pad is fully broken in.
Stretching and Flexing
In addition to wearing and using heat on your chest protector, it’s also important to stretch and flex the pads to help them conform to your body shape. Here’s how:
- Stand up straight and place your hands on the shoulders of your chest protector.
- Push down gently on the shoulders to stretch the chest protector.
- Flex your arms and chest to help the pads conform to your body shape.
By following these tips, you can ensure that your goalie chest protector fits comfortably and provides the protection you need on the ice.
Preparing Your Goalie Chest Protector for Breaking In
Removing any Labels or Tags
When it comes to breaking in your goalie chest protector, one of the first steps is to remove any labels or tags that may be attached to the equipment. These labels or tags can sometimes cause discomfort or irritation when worn, so it’s important to remove them before wearing the protector for the first time.
Here are some steps to follow when removing labels or tags from your goalie chest protector:
- Locate the label or tag: Look for any labels or tags that may be attached to the goalie chest protector. These are usually found on the inside of the equipment, near the neck or shoulder areas.
- Cut the label or tag: Use scissors or a sharp knife to carefully cut the label or tag from the equipment. Be sure to cut close to the fabric to avoid damaging the material.
- Remove any remaining adhesive residue: If there is any adhesive residue left behind after removing the label or tag, use a cloth or sticky tape to gently remove it. This will help prevent any discomfort or irritation when wearing the protector.
- Inspect the equipment: Once you have removed the label or tag, inspect the equipment for any damage or tears. If you notice any issues, it’s best to have the equipment repaired before wearing it.
Remember, removing labels or tags from your goalie chest protector is an important step in breaking it in properly. By following these steps, you can ensure that your equipment is comfortable and performs at its best.
Inspecting the Protector for Damage or Imperfections
Before breaking in your goalie chest protector, it is essential to inspect it for any damage or imperfections. This step is crucial to ensure that the protector is safe to use and will not hinder your performance on the ice. Here are some key points to consider when inspecting your goalie chest protector:
- Check for any visible signs of damage, such as cracks, tears, or loose stitching. If you notice any damage, it is important to contact the manufacturer or retailer immediately to request a replacement.
- Look for any imperfections in the material, such as bubbles, wrinkles, or uneven surfaces. These imperfections may affect the fit and comfort of the protector and should be addressed before breaking it in.
- Verify that all of the protective features, such as pads and plates, are properly secured and in good condition. These features are critical to providing adequate protection on the ice, so it is important to ensure that they are functioning correctly.
- Make sure that the protector is the correct size and fit for your body. A poorly fitting protector can impede your movement and reduce your performance, so it is important to ensure that it is comfortable and well-tailored to your body.
By carefully inspecting your goalie chest protector for damage or imperfections, you can ensure that it is safe and effective to use. This will allow you to focus on breaking it in and preparing it for use on the ice.
Choosing the Right Breaking-in Method
Selecting the right breaking-in method is crucial for ensuring the effectiveness and longevity of your goalie chest protector. Here are some factors to consider when choosing a breaking-in method:
- Your Skill Level: If you are a beginner or intermediate player, it is recommended to use a breaking-in method that gradually eases your body into wearing the chest protector. On the other hand, if you are an advanced player, you may opt for a more rigorous breaking-in method to help you quickly adapt to the protector’s weight and feel.
- Your Playing Style: Different playing styles require different levels of mobility and flexibility. For example, a butterfly goaltender may require a breaking-in method that focuses on maintaining a low center of gravity, while a stand-up goaltender may benefit from a method that emphasizes full range of motion.
- The Material of Your Chest Protector: The material of your chest protector can also impact your choice of breaking-in method. For instance, if your protector is made of composite materials, you may want to choose a method that avoids excessive impact or pressure on specific areas of the protector.
- Your Physical Conditioning: If you have any pre-existing physical conditions or injuries, it is important to choose a breaking-in method that takes these into account. Consult with a sports medicine professional or trainer to ensure that the method you choose is safe and effective for your specific needs.
By considering these factors, you can select the breaking-in method that best suits your needs and helps you fully break in your goalie chest protector.
Method 1: Wearing the Protector for Short Periods of Time
If you’re new to playing hockey, or if you’ve recently purchased a new goalie chest protector, you may be wondering how to break it in. Breaking in your goalie chest protector properly will help you get used to the feel of the equipment and make it more comfortable to wear during games. Here’s a comprehensive guide on how to break in your goalie chest protector using the “wearing the protector for short periods of time” method.
- Start by wearing your goalie chest protector for short periods of time, such as 15-20 minutes at a time. This will allow your body to adjust to the weight and feel of the equipment without becoming too uncomfortable.
- As you continue to wear the protector, gradually increase the amount of time you wear it for. For example, you might start with 15-20 minute intervals and work your way up to 30-45 minute intervals over the course of a few days or weeks.
- During the initial breaking-in period, it’s important to take breaks and remove the protector periodically to allow your body to rest and recover. Taking breaks will also help prevent any discomfort or pain that may occur from wearing the equipment for extended periods of time.
- As you continue to wear the protector, pay attention to any areas that may feel particularly uncomfortable or tight. These areas may need to be adjusted or loosened to ensure a proper fit.
- It’s also important to remember to stay hydrated and drink plenty of water throughout the day when breaking in your goalie chest protector. This will help prevent any dehydration-related discomfort or pain.
By following these steps, you can properly break in your goalie chest protector using the “wearing the protector for short periods of time” method. Remember to be patient and give your body time to adjust to the new equipment, and you’ll be ready to hit the ice in no time!
Method 2: Wearing the Protector for Longer Periods of Time
One effective method for breaking in your goalie chest protector is by wearing it for longer periods of time. This method involves gradually increasing the duration of time you wear the protector during practice or games.
Here are some tips to consider when wearing your goalie chest protector for longer periods of time:
- Start by wearing the protector for short periods of time, such as 15-20 minutes, during practice or games.
- Gradually increase the duration of time you wear the protector by 5-10 minute increments each time you wear it.
- Make sure to take breaks and remove the protector when necessary to allow your body to rest and recover.
- Continue to wear the protector for longer periods of time until you are comfortable wearing it for the entire duration of practice or games.
It’s important to note that every goalie’s body is different, so the time it takes to break in the protector may vary. Be patient and make sure to listen to your body to avoid any discomfort or injury.
Wearing the protector for longer periods of time not only helps break it in, but it also allows you to become more comfortable and confident wearing it during games.
Method 3: Using a Breaking-in Creme or Powder
If you’re looking for a more traditional method to break in your goalie chest protector, consider using a breaking-in creme or powder. These products are specifically designed to soften and mold the foam in your chest protector, making it more comfortable and flexible. Here’s how to use them:
Step 1: Clean the Chest Protector
Before applying the breaking-in creme or powder, make sure to clean your chest protector with warm water and mild soap. This will remove any dirt or debris that may interfere with the breaking-in process.
Step 2: Apply the Breaking-in Creme or Powder
Read the instructions on the product packaging carefully, as different brands may have slightly different application methods. In general, you’ll want to apply a small amount of the creme or powder to your hands and work it into your chest protector. Be sure to cover all areas evenly.
Step 3: Wear the Chest Protector
Once you’ve applied the breaking-in creme or powder, put on your chest protector as you normally would. This will allow the product to work its way into the foam and break it in over time.
Step 4: Repeat as Needed
Depending on the product and your personal preference, you may need to repeat the process several times to achieve the desired level of comfort and flexibility. Follow the instructions on the product packaging for guidance on how many times to repeat the process.
Step 5: Allow Time for the Foam to Dry
After applying the breaking-in creme or powder, allow the foam to dry completely before wearing your chest protector. This will ensure that the product has fully penetrated the foam and broken it in properly.
Using a breaking-in creme or powder is a convenient and effective way to break in your goalie chest protector. It’s important to follow the instructions carefully and be patient to achieve the best results.
Tips for a Successful Breaking-in Process
When it comes to breaking in your goalie chest protector, there are several tips that can help ensure a successful process. Here are some things to keep in mind:
- Choose the right temperature: The temperature of the rink can have a big impact on the breaking-in process. If the rink is too cold, it can make the process more difficult. On the other hand, if the rink is too warm, it can cause the chest protector to become too soft too quickly. The ideal temperature for breaking in a chest protector is around 60-70 degrees Fahrenheit.
- Take breaks: Breaking in a chest protector can be a physically demanding process, so it’s important to take breaks when needed. If you feel tired or sore, take a break and come back to it later.
- Listen to your body: It’s important to listen to your body when breaking in your chest protector. If something feels uncomfortable or painful, stop and adjust as needed.
- Wear proper clothing: Wearing the right clothing can make the breaking-in process more comfortable. Wear layers that can be easily removed or adjusted, and make sure you’re wearing comfortable shoes.
- Stay hydrated: Breaking in a chest protector can be a sweaty process, so it’s important to stay hydrated. Bring water with you to the rink and drink regularly throughout the day.
By following these tips, you can help ensure a successful breaking-in process for your goalie chest protector.
Keeping Your Protector Clean and Dry
As a goalie, your chest protector is an essential piece of equipment that requires proper care and maintenance. One of the most important steps in breaking in your goalie chest protector is to keep it clean and dry. Here are some tips to help you achieve this:
Remove Dirt and Grime
After each use, it’s important to remove any dirt, grass, or debris that may have accumulated on your chest protector. This can be done by simply shaking out the protector or using a brush to remove any loose debris. If there is stubborn dirt or grime, you can use a soft-bristled brush or a soft cloth to gently scrub the protector.
Dry the Protector Completely
It’s important to ensure that your chest protector is completely dry before storing it. If there is any moisture remaining in the protector, it can lead to the growth of bacteria and fungus, which can cause odors and damage to the equipment. To dry the protector, you can either air-dry it or use a towel to pat it dry.
Avoid Exposure to Water
While it’s important to keep your chest protector dry, it’s also important to avoid exposing it to water altogether. This means avoiding submerging the protector in water or using it in wet conditions. If your protector does get wet, make sure to dry it as soon as possible to prevent any damage.
Maintain the Protector’s Condition
By keeping your chest protector clean and dry, you can help maintain its condition and ensure that it lasts for a long time. Remember to inspect the protector regularly for any signs of wear and tear, and make any necessary repairs or replacements to keep it in top condition.
Storing Your Protector Properly when Not in Use
When you’re not using your goalie chest protector, it’s important to store it properly to ensure it stays in good condition and is ready for use when you need it. Here are some tips for storing your protector:
- Keep it dry: Moisture can cause damage to your chest protector, so make sure to keep it dry at all times. If you’ve been sweating during a game or practice, make sure to wipe it down with a towel before storing it.
- Store it in a cool, dry place: Ideally, you should store your chest protector in a cool, dry place, away from direct sunlight. This will help prevent any damage to the material and ensure it stays in good condition.
- Use a protector cover: A protector cover can help keep your chest protector clean and free from dust and dirt. It can also help protect it from any scratches or dents that may occur when storing it.
- Don’t stack other equipment on top of it: If you have other equipment that you need to store, make sure not to stack it on top of your chest protector. This can cause damage to the material and shape of the protector.
- Inspect it regularly: Before each use, inspect your chest protector for any signs of damage or wear and tear. If you notice any issues, make sure to address them before using it again.
By following these tips, you can ensure that your goalie chest protector stays in good condition and is ready for use when you need it.
The Breaking-in Process: What to Expect
Initial Discomfort and Adjustment Period
While breaking in your goalie chest protector is essential for optimal performance, it is common to experience initial discomfort during the adjustment period. The following points detail what to expect during this phase:
- Soreness and stiffness: As your body adapts to the new equipment, you may experience soreness and stiffness in your chest, shoulders, and back. This discomfort is normal and is a result of your muscles adjusting to the new gear.
- Limited range of motion: Due to the stiffness, you may find that your range of motion is restricted while wearing the chest protector. This is temporary and will improve as your body becomes accustomed to the equipment.
- Discomfort during physical activity: During the adjustment period, you may find that your chest protector feels uncomfortable or cumbersome while engaging in physical activity. This discomfort is normal and will lessen as your body adapts to the new gear.
- Increased sweating: As your body works to break in the chest protector, you may experience increased sweating and discomfort during intense physical activity. This is a normal part of the process and is a sign that your body is adjusting to the new equipment.
- Proper care and maintenance: To help alleviate discomfort and promote proper breaking in, it is essential to care for your chest protector according to the manufacturer’s instructions. This includes washing and drying the equipment correctly and avoiding excessive exposure to heat or sunlight.
It is important to remember that the initial discomfort and adjustment period are a normal part of the breaking-in process for your goalie chest protector. With time and proper care, your body will adapt to the new equipment, and you will experience increased comfort and performance on the ice.
Progressively Increasing Wear Time
The breaking-in process of a goalie chest protector is a crucial step in ensuring its longevity and performance. One of the most important aspects of this process is progressively increasing wear time.
- Importance of Progressive Increase:
- Gradually increasing the amount of time you wear your chest protector allows your body to adapt to the equipment and prevent discomfort or injury.
- This approach also allows the gear to conform to your body shape, ensuring optimal protection and mobility.
- Timeline for Increasing Wear Time:
- Start by wearing your chest protector for short periods of time, such as 30 minutes to an hour, during practice or training sessions.
- Gradually increase the duration of wear by 15-30 minutes each time, until you are comfortable wearing it for the full duration of the game or practice.
- It is important to listen to your body and not increase wear time too quickly, as this can lead to discomfort or injury.
- Additional Tips for Breaking in the Chest Protector:
- Make sure to wear it during a variety of movements, such as catching, blocking, and skating, to ensure it is comfortable in all situations.
- Take breaks as needed to stretch and allow your body to recover.
- Consider wearing it during non-contact practices or scrimmages to help break it in further.
By following these guidelines, you can ensure that your goalie chest protector is properly broken in and ready for the demands of the game.
Signs that Your Protector is Fully Broken In
Breaking in your goalie chest protector is a crucial process that can greatly impact your performance on the ice. Here are some signs that indicate your protector is fully broken in:
- Comfort: The most obvious sign that your protector is fully broken in is when it becomes more comfortable to wear. During the breaking-in period, the foam inside the protector may shift or settle, which can cause discomfort at first. However, as the protector molds to your body and the foam settles, it should become more comfortable to wear over time.
- Fit: Another sign that your protector is fully broken in is when it fits perfectly. A properly broken-in protector should fit snugly and comfortably against your body without any gaps or excess material.
- Mobility: A fully broken-in protector should also allow for greater mobility and flexibility. As the foam inside the protector molds to your body, it should become easier to move and make saves.
- Durability: Finally, a fully broken-in protector should be more durable and resistant to impact. While it’s important to avoid collisions, even minor hits and bumps can cause damage to a protector that’s not fully broken in. However, once the foam inside the protector has settled and molded to your body, it should be more resistant to impact and last longer.
By paying attention to these signs, you can ensure that your goalie chest protector is properly broken in and ready for gameplay.
Maintaining Your Goalie Chest Protector
Regular Inspection and Cleaning
Regular inspection and cleaning of your goalie chest protector is essential to ensure that it remains in good condition and continues to provide optimal protection. Here are some tips for maintaining your goalie chest protector:
Check for Wear and Tear
The first step in maintaining your goalie chest protector is to check it for any signs of wear and tear. Look for any cracks, tears, or holes in the material, as well as any loose or broken straps. If you notice any damage, it’s important to have the protector repaired or replaced as soon as possible to avoid any further damage.
Remove Dirt and Debris
After each use, it’s important to remove any dirt, debris, or sweat that may have accumulated on the protector. This can be done by gently wiping the protector with a damp cloth or sponge. Avoid using harsh chemicals or cleaners, as these can damage the material and reduce its effectiveness.
Air Out the Protector
In addition to cleaning the protector, it’s also important to allow it to air out after each use. This can help to prevent the growth of bacteria and odors, and can also help to extend the life of the protector. Simply hang the protector up in a well-ventilated area, away from direct sunlight, until it’s completely dry.
Store the Protector Properly
When not in use, it’s important to store the protector properly to prevent damage and maintain its shape. The protector should be stored in a cool, dry place, away from direct sunlight and sources of heat. It’s also important to keep the protector in its proper position, with the chest and back straps hanging freely, to prevent any creasing or folding.
By following these tips for regular inspection and cleaning, you can help to ensure that your goalie chest protector remains in good condition and continues to provide optimal protection on the ice.
Proper Storage Techniques
When it comes to maintaining your goalie chest protector, proper storage techniques are essential to ensure that it remains in good condition and ready for use when you need it. Here are some tips for storing your goalie chest protector:
- Store your chest protector in a cool, dry place. This is important to prevent any damage to the padding or other materials that make up the protector.
- If you have limited space, consider investing in a protective case for your chest protector. This will not only keep it safe from damage, but it will also help to keep it organized and easy to access.
- Avoid stacking other equipment on top of your chest protector, as this can cause damage to the padding or other materials.
- If you need to transport your chest protector to games or practices, make sure it is properly secured in your equipment bag to prevent any movement or damage during transit.
By following these simple storage techniques, you can help to extend the life of your goalie chest protector and ensure that it remains in good condition for years to come.
Periodic Re-breaking-in as Needed
As your goalie chest protector undergoes regular wear and tear, it’s crucial to periodically re-break it in to ensure it maintains its optimal level of performance. This process, known as re-breaking-in, involves re-shaping the foam and re-establishing the pocket and tension that’s specific to your body and style of play. Here’s a comprehensive guide on how to perform this task effectively:
Timing
The frequency of re-breaking-in will depend on your individual playing schedule and the level of wear on your chest protector. As a general guideline, re-breaking-in should be performed every 10-20 games or after every few months of regular use.
Tools and Materials
- Thin, flat blade screwdriver or a butter knife
- Rolling pin or a firm, smooth object (e.g., a baseball bat handle)
- Protective gloves
Steps
- Inspect and clean: Before re-breaking-in your chest protector, make sure it’s clean and free from any dirt or debris. Use a soft, damp cloth to wipe away any grime, and allow it to air dry completely.
- Re-shape the foam: Using the thin, flat blade screwdriver or butter knife, carefully push back any compressed foam that has lost its shape. Start at the edges and work your way towards the center, ensuring that you maintain the overall shape of the protector.
- Apply heat: Heat helps to soften the foam, making it easier to reshape. Use a hairdryer or heat gun to apply warm air to the foam for 10-15 seconds, or until it feels slightly pliable. Be cautious not to apply too much heat, as it may damage the foam or cause discomfort when worn.
- Roll the foam: With the protective gloves on, use the rolling pin or firm, smooth object to roll the foam evenly along the length and width of the chest protector. This step helps to distribute the heat and evenly reshape the foam. Move slowly and steadily, applying consistent pressure, and take breaks as needed to avoid over-rolling.
- Allow to cool and set: After rolling the foam, let it cool down completely before wearing it again. This process should take around 30 minutes to an hour, depending on the temperature and the thickness of the foam. Once cooled, the foam should retain its new shape and feel more comfortable than before.
By following these steps, you can ensure that your goalie chest protector remains in top condition and continues to provide the necessary protection and performance you need on the ice.
Frequently Asked Questions about Breaking in Goalie Chest Protectors
What if I don’t have time for a proper breaking-in process?
If you are short on time and cannot dedicate sufficient hours to properly break in your goalie chest protector, there are still steps you can take to ensure a reasonable level of comfort and performance. While a complete breaking-in process is ideal, these abbreviated methods can still provide some benefits:
- Rolling and Stretching: In the absence of time for the full breaking-in process, try gently rolling and stretching the chest protector in various directions. This can help loosen up the foam and allow for a slight improvement in comfort. Be cautious not to apply excessive force, as this may damage the protector or cause it to lose its shape.
- Wearing Over Clothing: Instead of directly placing the chest protector against your skin, wear it over a thin layer of clothing. This additional layer can provide a barrier between your skin and the foam, which may reduce irritation and increase comfort. Keep in mind that this method will not provide the same level of comfort as a properly broken-in protector, but it may help alleviate some discomfort.
- Breaking in Gradually: If you cannot dedicate extended periods to breaking in your chest protector, consider breaking it in gradually over time. This may involve wearing the protector for shorter periods each day, gradually increasing the duration as your body adapts to the foam. While this method will still require some time, it can be a more manageable approach for those with limited time.
It is important to remember that a properly broken-in chest protector will offer superior comfort and performance. However, if you are unable to dedicate the necessary time to the breaking-in process, these abbreviated methods can still provide some benefits and help improve your experience.
Can I use my chest protector during the breaking-in process?
If you’re eager to start playing and practicing with your new goalie chest protector, you might be wondering if it’s okay to use it during the breaking-in process. The answer is yes, you can use your chest protector during the breaking-in process, but there are a few things you should keep in mind.
Firstly, it’s important to note that the breaking-in process is not just about wearing the chest protector. It’s also about getting it to fit properly and feel comfortable, which may take some time. During the breaking-in process, you may experience some discomfort or feel like the chest protector is too tight or too loose. This is normal and part of the process.
Additionally, you should avoid using your chest protector during games or intense practices until it’s fully broken in. While it’s okay to use it during the breaking-in process, it’s still a new piece of equipment and may not provide the same level of protection as a fully broken-in chest protector. It’s best to save the games and intense practices for after the breaking-in process is complete.
Finally, it’s important to remember that the breaking-in process is unique to each individual and their specific chest protector. Some chest protectors may break in more quickly than others, and some individuals may break in their chest protector more quickly than others. Be patient and follow the guidelines provided by the manufacturer for the best results.
How long should I wait before using my new chest protector in a game?
When it comes to using your new goalie chest protector in a game, there are different opinions on how long you should wait before doing so. Some experts suggest breaking it in for at least a week or two before using it in a game, while others believe that you can use it right out of the box. Ultimately, the decision depends on your personal preference and the level of play you are participating in.
If you choose to break in your chest protector for a longer period of time, it will typically involve wearing it for extended periods of time, such as several hours a day, and gradually increasing the amount of time you wear it. This allows the pads to conform to your body and become more comfortable and secure. Additionally, breaking in your chest protector through consistent wear can help to ensure that it stays in good condition for a longer period of time.
On the other hand, if you prefer to use your new chest protector right away, it is important to ensure that it fits properly and is comfortable before doing so. You should also take care to avoid any unnecessary impacts or collisions during the first few games, as your chest protector may not be fully broken in yet.
Regardless of which approach you choose, it is important to remember that breaking in your goalie chest protector is a process that takes time and patience. By taking the time to properly break in your equipment, you can help to ensure that it provides the protection and support you need on the ice.
Ensuring a Comfortable and Protective Fit for Optimal Performance
Achieving optimal performance in goalkeeping requires a goalie chest protector that fits comfortably and provides the necessary protection. This section will provide a comprehensive guide on how to ensure a comfortable and protective fit for your goalie chest protector.
Choosing the Right Size
The first step in ensuring a comfortable fit is choosing the right size. Goalie chest protectors come in different sizes, and it is essential to choose one that fits your body size and shape. To determine the right size, you should measure your chest and follow the size chart provided by the manufacturer. It is important to note that a well-fitting chest protector should not be too tight or too loose, as it may hinder your movement and limit your ability to make saves.
Breaking in the Chest Protector
Breaking in your goalie chest protector is crucial to achieving a comfortable fit. The process of breaking in the chest protector involves wearing it for an extended period, typically for several hours or even days. During this period, the chest protector will mold to your body shape, making it more comfortable and providing a better fit. It is important to note that breaking in the chest protector may cause some discomfort, but it is a necessary step to ensure a comfortable fit for optimal performance.
Adjusting the Straps
Adjusting the straps of your goalie chest protector is also crucial to ensuring a comfortable and protective fit. The straps should be adjusted to fit your body size and shape, providing a snug fit without being too tight. Loose straps may cause the chest protector to move around during play, which can be distracting and limit your ability to make saves. On the other hand, tight straps may be uncomfortable and cause discomfort during play.
Maintaining the Chest Protector
Maintaining your goalie chest protector is also essential to ensuring a comfortable and protective fit. It is important to wash the chest protector regularly to remove any dirt or sweat that may accumulate during play. You should also check the chest protector for any signs of wear and tear, such as tears or holes, and replace it if necessary.
In conclusion, ensuring a comfortable and protective fit for your goalie chest protector is crucial to achieving optimal performance on the ice. By choosing the right size, breaking in the chest protector, adjusting the straps, and maintaining the chest protector, you can ensure a comfortable and protective fit that will help you make saves and perform at your best.
FAQs
1. What is the best way to break in a goalie chest protector?
Breaking in a goalie chest protector involves gradually stretching and softening the material through use and wear. Start by wearing the protector for longer periods during practice or games, and gradually increase the duration of wear over time. You can also try wearing the protector while doing light activities, such as jogging or skating, to help stretch the material. It’s important to remember that breaking in a chest protector can take time, so be patient and consistent with your use.
2. How long does it take to break in a goalie chest protector?
The amount of time it takes to break in a goalie chest protector can vary depending on the individual and the level of play. However, it’s generally recommended to wear the protector for at least a few games or practices before using it in a competitive setting. Some goalies may feel a noticeable difference in the fit and feel of the protector after just a few uses, while others may need to continue wearing it for several weeks or months before it feels comfortable.
3. Can I use heat to break in my goalie chest protector?
Using heat to break in a goalie chest protector is not recommended. Applying heat can cause the material to stretch unevenly and may lead to discomfort or even damage to the protector. Instead, rely on gradual wear and stretching to break in the protector over time.
4. What should I look for when assessing the fit of my goalie chest protector?
When assessing the fit of your goalie chest protector, consider the following factors:
* Comfort: The protector should fit comfortably without causing any pinching or discomfort.
* Mobility: The protector should allow for full range of motion and not hinder your ability to move or make saves.
* Stability: The protector should remain in place and provide adequate protection during play.
* Customization: Some goalie chest protectors come with adjustable straps or pads that can be customized for a better fit. Make sure to adjust these features to your liking.
5. How do I maintain my goalie chest protector?
To maintain your goalie chest protector, follow these steps:
* Clean the protector regularly with a mild soap and water solution, using a soft brush to remove any dirt or debris.
* Allow the protector to air dry completely before storing it or using it again.
* Inspect the protector for any signs of wear or damage before each use.
* Consider using a protective coating or waterproofing agent to help repel moisture and prolong the life of the protector.